02 - Introduction to ROS
Robotics I
Poznan University of Technology, Institute of Robotics and Machine Intelligence

Laboratory 2: Introduction to Robot Operating System
Goals
- Understand the basic concepts of Robot Operating System
- Familiarize with ROS 2 commands and tools
- Get hands-on experience with the basic use of ROS 2
- Explore ROS 2 applications in modern robotics
Resources
Robot Operating System
 Source: https://www.ros.org
The Robot Operating System (ROS) is a set of software libraries and tools that help you build robot applications. From drivers to state-of-the-art algorithms, and with powerful developer tools, ROS has what you need for your next robotics project. And it’s all open source.
The Robot Operating System (ROS) was first released in 2007 as ROS 1 for advanced research projects. However, ROS 1 was limited by weaknesses related to message access security and lack of adaptation to the needs of real-time systems. Therefore, the second generation, ROS 2, was redesigned to address these challenges, with the first release in 2017. Despite this change, the main concepts remain the same:
- processing based on independent modules (nodes)
- communication through publishing and subscribing (publisher/subscriber concept)
- communication with feedback through services or actions (services, actions)
- language-neutrality - any programming language can be integrated (ROS client library).
During the labs we will use the latest stable version of ROS 2 - Jazzy Jalisco.
Basic concepts
Workspace
A ROS 2 workspace is a directory containing multiple packages with
build configurations and dependencies, e.g. for a particular robot. You
can have many different workspaces on one machine
(e.g. ros2_robotA_ws, ros2_robotB_ws). Usually
ROS 2 workspaces are structured as follows:
ros2_ws
├── build - contains files for the build process, so that only new changes can be included in the re-build
├── install - location where packages are installed
├── log - contains the log of the build process
└── src - directory containing developer's ROS 2 packages
The ROS 2 environment is built using colcon, with the following command:
colcon buildIf necessary, it is possible to build a single package:
colcon build --packages-select <PACKAGE NAME>The first and required step before working with the built ROS 2 environment is to set the environment variables (source), in order to access the packages in a particular terminal.
In the ~/ros2_ws directory, call the command:
source install/setup.bashAt the first launch, if the environment is not yet built, it may be
necessary to activate the global ROS 2 variables using the below
command. In our case, ROS 2 distribution is jazzy.
source /opt/ros/$ROS_DISTRO/setup.bashNote: Every time you open a terminal window and want
to work in a specific environment, run the above command in the
appropriate directory! It should be called in the root directory of the
ROS 2 environment (e.g. ~/ros2_ws).
Package
A package is essential container that organize nodes and structurize source code, increasing its modularity. It enables easy management and integration of nodes, executables, and other resources within the ROS 2 ecosystem by specifying metadata and build instructions.
Example package structure in Python is as below:
my_package/
├── my_package        - directory containing the nodes
│   └── __init__.py
├── package.xml       - contains information about the package and its dependencies
├── resource
│   └── my_package    - directory required to locate the package
├── setup.cfg         - holds information about the executable files
├── setup.py          - contains instructions for installing the package
└── test              - contains scripts for automatic testing
The organization of packages is done by using ament, an evolution of catkin known from ROS 1. To create a template package in C++ and Python simply call the following functions: - C++
ros2 pkg create --build-type ament_cmake <PACKAGE NAME>- Python
ros2 pkg create --build-type ament_python <PACKAGE NAME>It is also possible to indicate dependencies with the
--dependencies argument and to create a node at the same
time via the additional --node-name argument.
Package Dependencies Management
A tool that greatly improves the work of a ROS 2 developer is rosdep. It allows automatic installation of dependencies (packages, libraries) for all packages in a given environment. Thanks to the fact that dependencies are defined in the package.xml file, there is no need to install them manually.
Many ready-made packages are available in the ROS 2 repository - rosdistro, any user has the possibility to add his package via pull request.
To use rosdep, run the following commands in the
~/ros2_ws directory:
sudo rosdep init
rosdep update
rosdep install --from-paths src -y --ignore-src --rosdistro jazzy
These commands initialize rosdep and then update the local
indexes from the rosdistro package database. The last command
installs the dependencies. The --from-paths src argument
tells it to look for package.xml file in the src
directory, -y causes console messages to be accepted
automatically, and --ignore-src omits packages in the
src directory from the installation (since we build them).
Graph concept
A ROS graph is a network of nodes that process data. It includes all nodes and the communication links between them. A ROS 2 graph contains:
- nodes - individual processes that exchange messages
- messages - data structures used for communication between nodes
- topics - communication channels between nodes
- discovery - the automatic process of establishing a connection between nodes
To visualize the current state of the graph, changing nodes and topics, as well as the connections between them, one can use rqt_graph tool:
rqt_graph
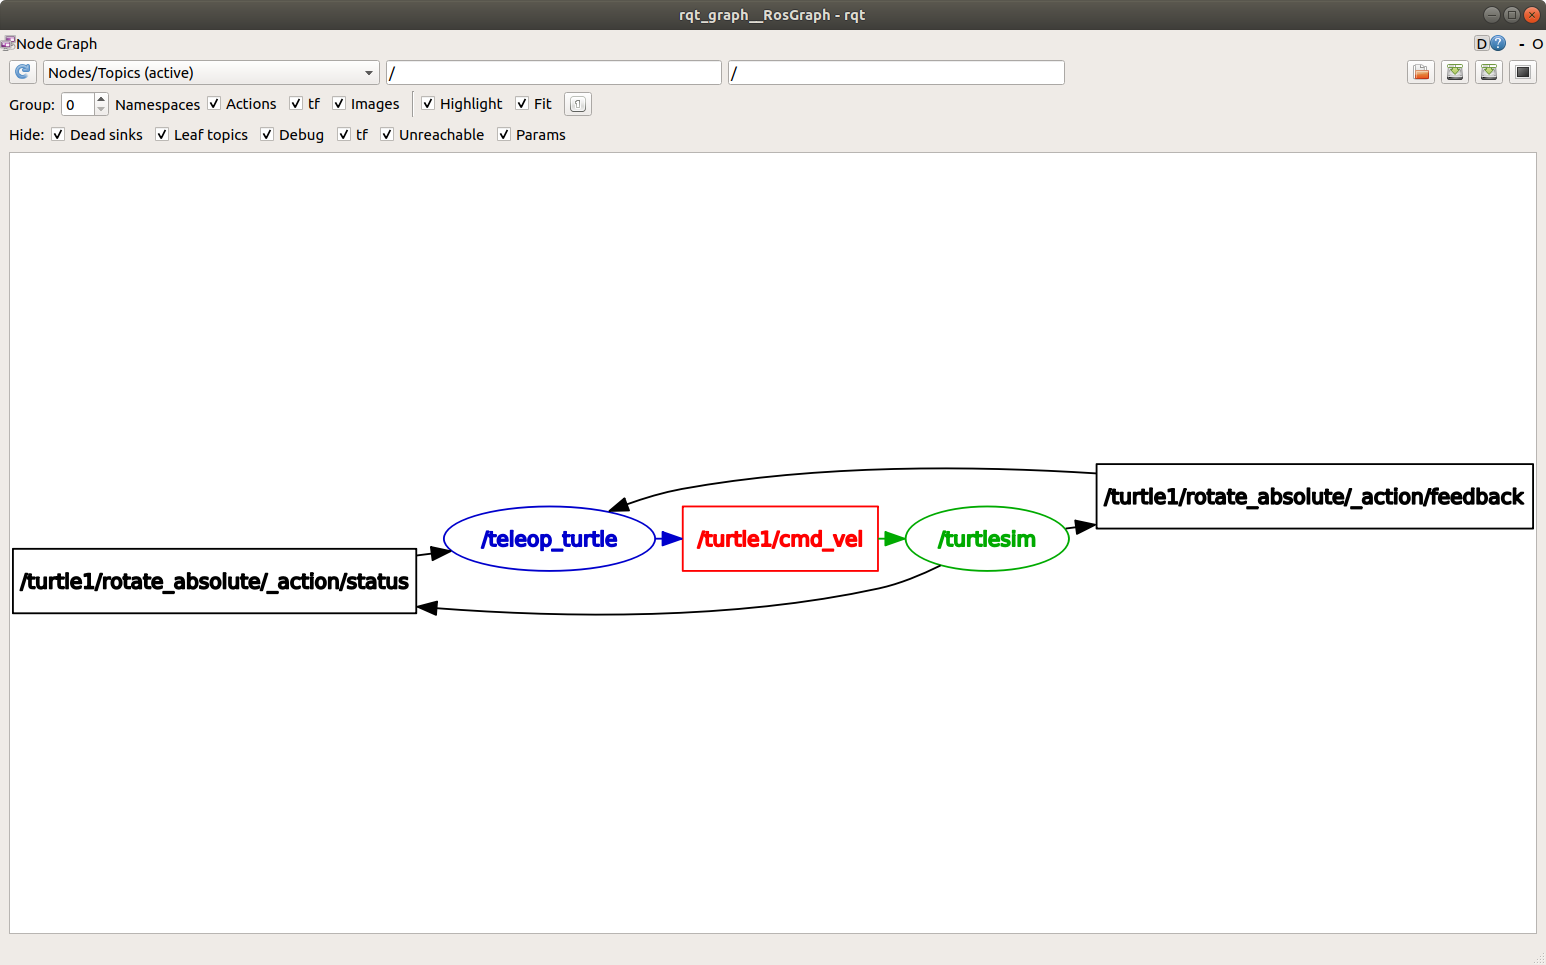 Source: https://docs.ros.org
Node
A node represents an individual process in ROS 2. Nodes perform computations, publish or subscribe to topics, and communicate with each other to perform specific tasks within a robotic system.
Nodes are started using the command:
ros2 run <PACKAGE NAME> <NODE NAME>To get the current list of nodes call:
ros2 node listTo get node information:
ros2 node info <NODE NAME>Launch files
For more complex ROS 2 applications it is useful to group nodes so
that they can be run together. This can be done using launch files,
which can define and configure not only the execution of multiple nodes,
but also runtime parameters, and actions, allowing automated system
startup and management. In ROS 2, launch files can be written in Python,
XML or YAML files, with the following extensions .xml,
.py or .yaml. See the “Using
Python, XML, and YAML for ROS 2 Launch Files” article for more
information.
To invoke an existing launch file, use the command:
ros2 run <PACKAGE NAME> <LAUNCH NAME>Message
Messages in ROS 2 are data structures used for communication between nodes to exchange information such as sensor data, commands, and states in a standardized format. There are many message types natively available in ROS 2 and they can contain different types of information (e.g. location, orientation, camera image). Examples of standard message types include:
- std_msgs/msg/Header - standard metadata for higher level stamped data types
- geometry_msgs/msg/Twist - object velocity in free space split into its linear and angular parts
- sensor_msgs/msg/Image - uncompressed image message
It is also possible to create your own message type - Creating custom msg and srv files.
To check the message interface definition, use the command:
ros2 interface show <MESSAGE TYPE>Topic
In ROS 2, topics are uniquely named communication channels that facilitate the asynchronous exchange of messages between nodes, allowing data to be published and subscribed to by different components of the system. A topic is created when a node begins publishing a particular type of message. A single node can publish messages to multiple topics and subscribe to messages from multiple topics. At the same time, a single topic can have multiple publishers and subscribers.
 Source:
https://docs.ros.org/en/jazzy/Tutorials/Beginner-CLI-Tools/Understanding-ROS2-Topics/Understanding-ROS2-Topics.html
To see the current list of topics, use the command below. By adding the `-t’ parameter, it is possible to display topics with their associated message types:
ros2 topic listTo read messages from a topic, simply use:
ros2 topic echo <TOPIC NAME>To get information about a specific topic, as well as the type of message being exchanged, use the command:
ros2 topic info <TOPIC NAME>It is also possible to post messages to a topic from the terminal:
ros2 topic pub <TOPIC NAME> <MESSAGE TYPE> "message_data"Example:
ros2 topic pub --once /turtle1/cmd_vel geometry_msgs/msg/Twist "{linear: {x: 2.0, y: 0.0, z: 0.0}, angular: {x: 0.0, y: 0.0, z: 1.8}}"To publish a message once, you can use the `–once’ argument.
To read the frequency with which data is published on a topic, use
the hz argument:
ros2 topic hz <TOPIC NAME>Message visualization
RViz is a 3D visualization tool that allows users to display information from topics, interactively view and analyze sensor data, robot states, and planning information in real time. In ROS 2, RViz is launched with the command:
rviz2
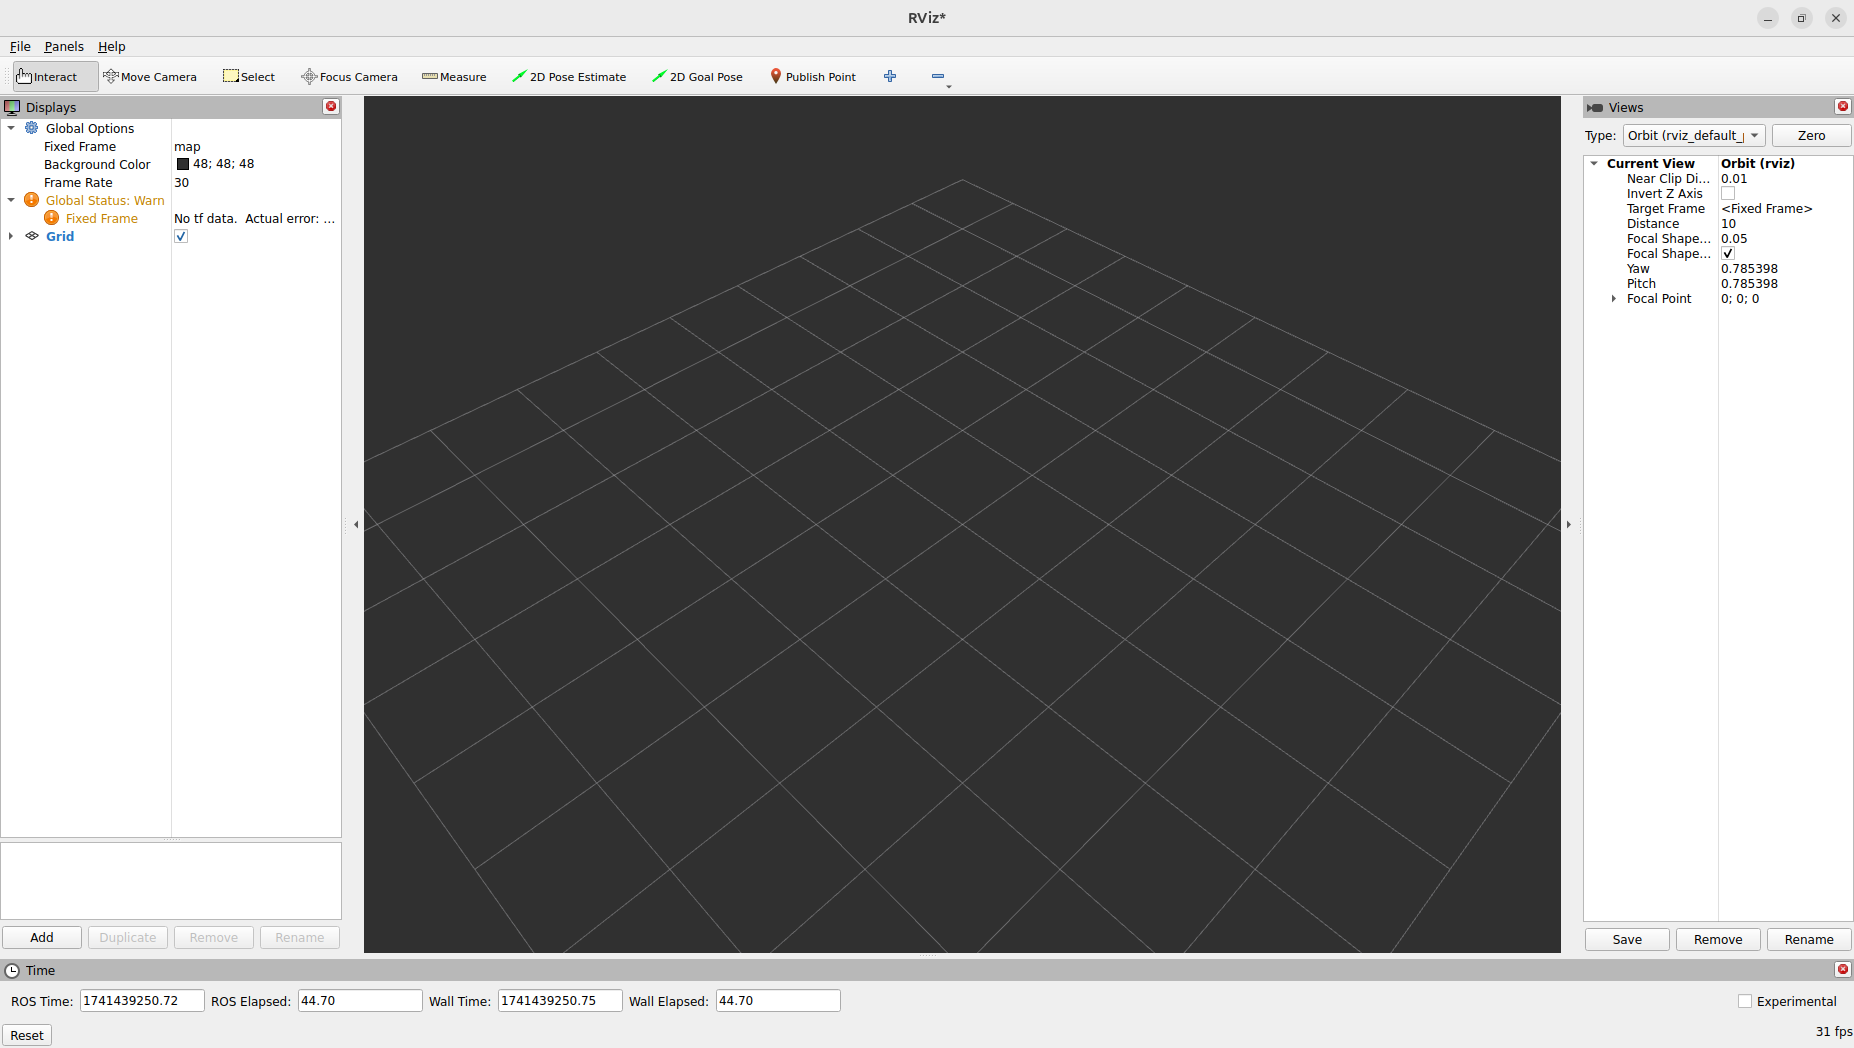
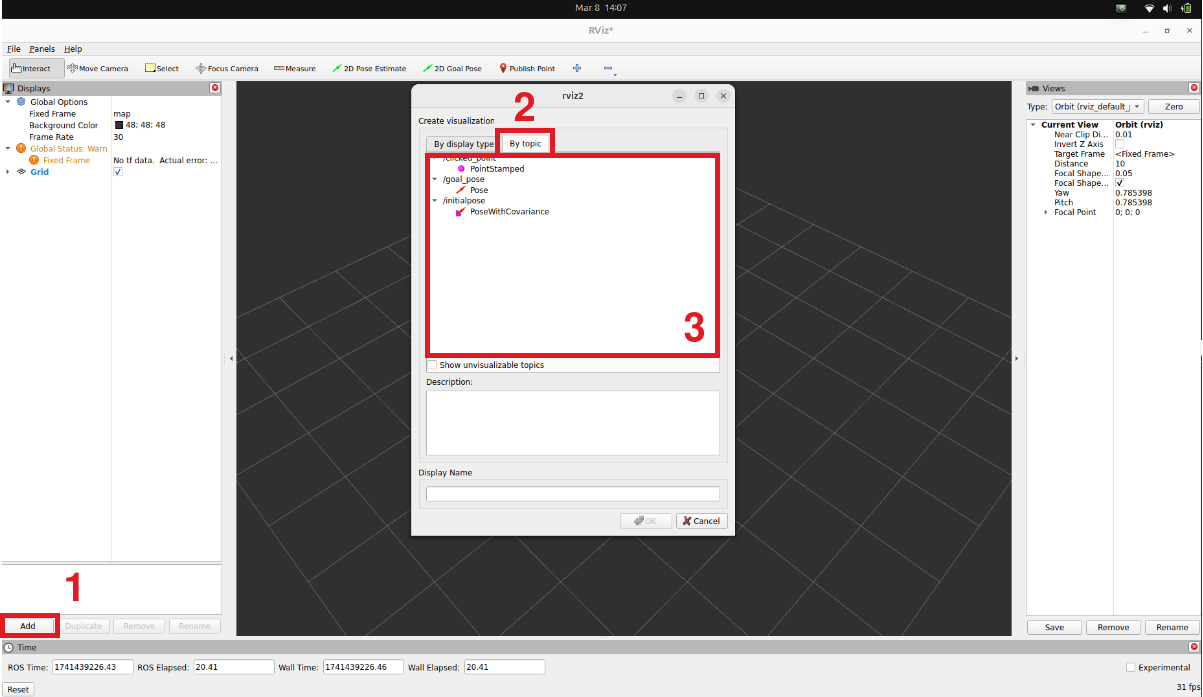
To add a new topic to the RViz visualizer, click the Add button (1). Then, in the pop-up window select By topic tab (2) and select the topic you are looking for from the list (3).
Dynamic simulation
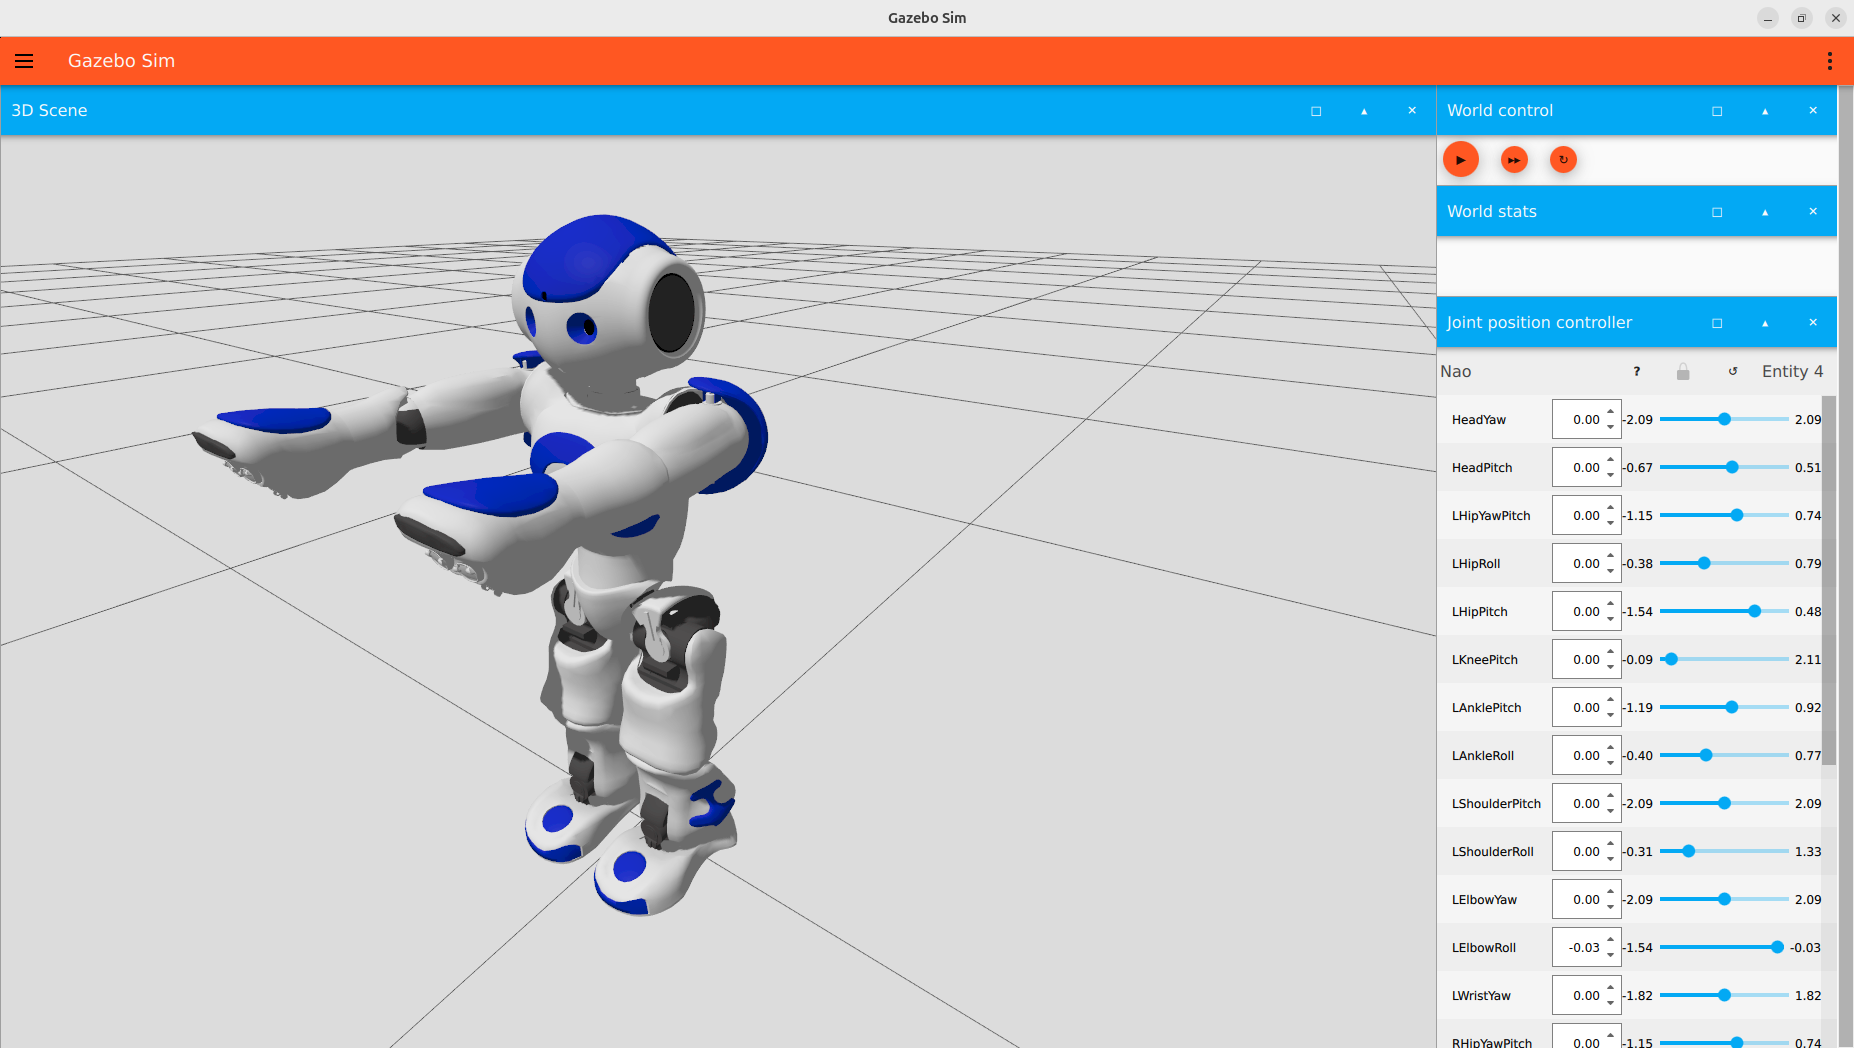
Gazebo in ROS 2 is a simulation tool that allows testing and development of robots in a virtual environment, offering realistic physics, sensor models, interaction, and 3D visualization. Gazebo can be launched with the command:
gz sim
Tasks
Note 1: Everything we do today should be done inside
the container! To attach another terminal to a running container use the
command docker exec -it <CONTAINER NAME> bash.
Note 2: Every time you open a terminal window and
want to work with ROS 2 you need to source environmental variables using
source /opt/ros/$ROS_DISTRO/setup.bash or
source install/setup.bash if you work in a specific ROS 2
workspace (e.g. ~/ros2_ws)!
- Pull
osrf/ros:jazzy-desktop-fulldocker image and create container usingdocker_run.shscript.
docker_run.sh
IMAGE_NAME="" # <DOCKER IMAGE REPOSITORY>:<DOCKER IMAGE TAG>
CONTAINER_NAME="" # student ID number

xhost +local:root

XAUTH=/tmp/.docker.xauth
if [ ! -f $XAUTH ]
then
    xauth_list=$(xauth nlist :0 | sed -e 's/^..../ffff/')
    if [ ! -z "$xauth_list" ]
    then
        echo $xauth_list | xauth -f $XAUTH nmerge -
    else
        touch $XAUTH
    fi
    chmod a+r $XAUTH
fi

docker stop $CONTAINER_NAME || true && docker rm $CONTAINER_NAME || true

docker run -it \
    --env="ROS_AUTOMATIC_DISCOVERY_RANGE=LOCALHOST" \
    --env="DISPLAY=$DISPLAY" \
    --env="QT_X11_NO_MITSHM=1" \
    --volume="/tmp/.X11-unix:/tmp/.X11-unix:rw" \
    --env="XAUTHORITY=$XAUTH" \
    --volume="$XAUTH:$XAUTH" \
    --privileged \
    --network=host \
    --name="$CONTAINER_NAME" \
    $IMAGE_NAME \
/bin/bash- Create workspace and
srcdirectory (e.g.~/ros2_ws/src). - Install opencv_cam that supports camera under ROS 2 to test how the camera operation works. To do so, follow these steps:
- In the
srcdirectory of ROS 2 workspace clone the following repositories:
git clone https://github.com/clydemcqueen/opencv_cam.git
git clone https://github.com/ptrmu/ros2_shared.git- From the workspace directory (e.g.
~/ros2_ws) build environment and then source it:
colcon build

source install/setup.bash- [Camera-based] Run the following command. Ignore errors related to camera info.
ros2 run opencv_cam opencv_cam_main- [Video-based] If you don’t have a camera or are
having trouble with it, test the operation using a video file. To do
this, prepare a video file and create opencv_cam_params.yaml
by filling the
fileandfilenamefields (you can skipcamera_info_pathandcamera_frame_idfields). Then run the following command:
ros2 run opencv_cam opencv_cam_main --ros-args --params-file opencv_cam_params.yaml- Using another terminal inspect the topics list, then information
about a camera topic, and finally read messages from these topics.
Explore
ros2 topic echodocumentation to check how to get rid of array fields when displaying messages in terminal. - Check the frequency with which camera images are published using ROS 2 command.
- Using rqt_image_view node preview camera stream. Repeat this step using the RViz message visualization tool. In both image visualization tools take a screenshot and upload it to the eKursy platform.
- Using
rqt_graphvisualize ROS 2 graph for the previous task. Check how the graph changes when the messages visualizer is running, which subscribes to the published topic. - In the
srcdirectory of ROS 2 workspace create a sample C++-based package and inspect it. To view the project structure, use thetreecommand (useapt install treeto install it if it is not available). Then, create a sample Python-based package and compare it with the previous one. Shortly, in 2-3 sentences, describe key differences in project structures (C++-based and Python-based) and consider what are the potential applications of each approach. Write your answer in a text file and upload it to eKursy. - Following the instructions in ROS
+ Gazebo Sim demos, simulate
air pressure,IMU,RGBD camera,depth cameraandGPU lidar. For each sensor, use the command line tools to check and note which messages it publishes and at what frequency. In addition, forRGBD camera,Depth camera, orGPU lidar, add additional objects to the simulator and check how they affect the measurements. Take a screenshot from RViz with topics preview and add it to eKursy. Do the same for a text file describing the published topics of the above five sensors..